How To Make Your PC Look Like Windows Phone 8?

Posted on:
tags: , , , ,

Windows Phone 7 offers a unique and exciting UI that displays lots of information efficiently on the screen.  And with a simple Rainmeter theme, you can have the same UI and content directly on your Windows 7 desktop.
Turn your Desktop into a Windows Phone 7 lookalike
To give your Windows 7 desktop a Windows Phone 7 makeover, first you need to have the free Rainmeter application installed.  If you do not have it installed, download it from the link below and run the setup.  Accept the license agreement, and install it with the default settings.


By default Rainmeter will automatically run when you start your computer.  If you do not want this, you can uncheck the box during the setup.

Now, download the Omnimo UI theme for Rainmeter (link below).  You will need to unzip the folder first.


This theme uses the Segoe UI and the Segoe UI Light font, so Windows Vista users need to install the segoeuil.ttf font first, and XP users need to install both the segoeui.ttf and the segoeuil.ttf font first.  Copy the appropriate fonts to C:\Windows\Fonts, or in Vista double-click on the font and select Install.


Now, run the Rainmeter theme setup.  Double-click on the Rainstaller.exe in the Omnimo folder.
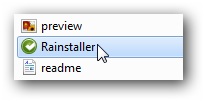
Click Express install to add the theme and skin to Rainmeter.


Click Finish, and by default Rainmeter will open with your new theme.

When the new theme opens the first time, you will be asked to read the readme, or simply go to the gallery.


When you open the gallery, you can choose from a wide variety of tiles and gadgets to place on your desktop.  You can also choose a different color scheme for your tiles.


Once you’re done, click the X in the top right hand corner to close the Gallery.  Welcome to your Windows Phone 7 desktop!  Many of the gadgets are dynamic, and you can change the settings for most of them.  The only thing missing is the transition animations that Windows Phone 7 shows when you launch an application.

To make it look even more like Windows Phone 7, you can change your background to black.  This makes the desktop theme really dramatic.


And, if you want to add gadgets or change the color scheme, simply click on the + logo on the top.

Windows Phone 7 Desktop Wallpapers
If you’d prefer to simply change your background, My Microsoft Life has several very nice Windows Phone 7 wallpapers available for free.  Click the link below to download these and other Microsoft-centric wallpapers.


If you can’t wait to get the new Windows phone 7, this is a great way to start experiencing the beauty of the phone UI on your desktop.
Links
My desktop look :


do share this post with your friends ... 
hope all of you like this post ...give your valuable comments 

---------------------------------------------------------------------------------
Posted By Sundeep aka SunTechie

Sundeep is a Founder of Youth Talent Auzzar, a passionate blogger, a programmer, a developer, CISE and these days he is pursuing his graduation in Engineering with Computer Science dept.
Add Sundeep as a Friend on

Automatically Lock Your Computer When You’re Away

Posted on:
tags: , ,

Would you like your computer to automatically lock and require you to enter your password when you exit the screensaver?  Here’s how to quickly change your screensaver settings to keep your computer secure when you’re away.
To get started, right-click on your desktop, and click Personalize to open the personalization settings dialog.
Click Screen Saver under the themes to change your screensaver settings.

Alternately, if you’d rather open the screensaver settings without grabbing your mouse, hit the Win key and enter Screen Saver in the search box, and select Change screen saver.
This will open the Screen Saver settings dialog.  Select the screensaver you want, then check the box to display the login screen when you exit the screen saver.  Enter the number of minutes you want to wait before your screensaver starts, then click Ok to save your settings.
Now, after the length of time you selected, you’ll see your screensaver as normal.
Then, when you move the mouse or press a key, you’ll see the normal login screen instead of your desktop.  Enter your password and login as normal to access your computer.


Windows 7 tricks: Copy To the Clipboard From the Windows Command Prompt

Posted on:
tags: , , ,

Let’s face it, not everybody is an ubergeek, so there are many times that you’ll need to ask somebody for help. They always seem to ask you to type things into the command prompt and then tell them the results… but how do you copy that text to the clipboard so you can email it to them?
I had always thought this was universally understood, but it turns out that a lot of people are unaware of how it works. There are two options, the default right-click menu… or QuickEdit mode. We’ll explain both.
Enable QuickEdit Mode
Right-click anywhere on the title bar and then select Properties. (Or use Alt+Space P)

On the Options tab, check the box for “QuickEdit Mode” and then close the dialog.
That was simple…
Copy / Paste in QuickEdit Mode
If you have this mode enabled, you can simply left-click anywhere in the window and drag a box around the text that you would like to select.
Once you’ve selected the text, you can either right-click anywhere in the window or use the Enter key to copy the selected text to the clipboard.
To paste into the command prompt, simply use the right mouse button anywhere inside the window while not in “Select” mode.
Copy / Paste With Right-Click Menu
If you don’t want to change any settings, you can just use the right-click menu to copy or paste text. Note that the right-click menu doesn’t show up with QuickEdit mode enabled.
Right-click on the background of the window and select “Mark”, and then draw a box around the text you want to copy.


Once you have selected the text you want, then use the right mouse button or the  Enter key to copy the selected text to the clipboard.
To paste into the window, right-click and choose the “Paste” option on the menu.


Add "Open with Notepad" to the Context Menu for All Files

Posted on:
tags: , , ,

The default method of opening unknown files forces you to go through a list of known applications and is generally a pain to deal with. That’s why I like to have a context menu option for “Open with Notepad” so that I can quickly open up files without having to go through a lot of trouble.
This registry hack is nothing new, it’s been around forever… think of this as a refresher course. Also note that you can use this same technique to substitute any other application that you’d like by adjusting the path in the registry to point to the different editor.
Manual Registry Hack
Open regedit.exe through the start menu search or run box, and then browse down to the following key:
HKEY_CLASSES_ROOT\*\shell

Right-click on “shell” and choose to create a new key, calling it “Open with Notepad”. Create a new key below that one called “command”. Double-click on the (Default) value in the right-hand pane and enter in the following:
notepad.exe %1
The change should take effect immediately… just right-click on any file and you’ll see the next menu entry.
Download Registry Hack
Just download, extract and double-click on the OpenWithNotepad.reg file to enter the information into the registry. There’s also an uninstall script included.


Access VirtualBox Virtual Machines from the Windows 7 Start Menu or Taskbar

Posted on:
tags: , , , , ,
If you open different virtual machines in VirtualBox often, you will like VBoxLaunch. It allows you to launch virtual machines directly from the Start menu using a jumplist without having to launch the VirtualBox Manager first.
VBoxLaunch does not change any settings in VirtualBox or the interface. It reads the list of virtual machines available in the VirtualBox Manager and creates direct links to those virtual machines in the jumplist for VBoxLaunch on the Start menu or the Taskbar.
Extract the .zip file you downloaded (see the download link at the end of the article) and copy the VBoxLaunch.exe file.
Paste the VBoxLaunch.exe file in the VirtualBox program directory (usually C:\Program Files\Oracle\VirtualBox). Right-click on the VBoxLaunch.exe file and select Create shortcut from the popup menu.

You may not have the correct permissions to create files in the VirtualBox program directory. If that is the case, Windows asks if you want to place the shortcut on the desktop instead. That is fine, so click Yes. It doesn’t matter where the shortcut is placed.


Right-click on the shortcut (wherever it was created) and select Pin to Start Menu.
NOTE: If you want to also access your virtual machines from the Taskbar, right-click the shortcut again and select Pin to Taskbar, as well.
To create the jumplist containing links to your VirtualBox virtual machines, you must start VBoxLaunch once to open the VirtualBox Manager and then exit. Start VBoxLaunch from the Start menu or Taskbar.
If the Open File – Security Warning dialog box displays, click Run to open the VirtualBox Manager.

Select Exit from the File menu to close the VirtualBox Manager.
Now, when you move your mouse over the VBoxLaunch Start menu item, a jumplist displays with all your available virtual machines listed. Simply select a virtual machine to open it without having to open the VirtualBox Manager first.
The jumplist is also available from the Taskbar if you pinned the VBoxLaunch shortcut there.
The Manage virtual machines item under Tasks on the jumplist opens the VirtualBox Manager. This allows you to remove any shortcuts to the VirtualBox Manager you had. All you need is the VBoxLaunch shortcut pinned to the Start menu or Taskbar.
VBoxLaunch requires the Microsoft .NET Framework 3.5, which should already exist in Windows 7. If, for some reason, you do not have the Microsoft .NET Framework, you can download it from http://www.microsoft.com/download/en/details.aspx?id=22. We tested VBoxLaunch on Windows 7 Ultimate 64-bit, but the developer says it should also work on 32-bit systems.
hope you  like this post ???
tell us plzz
admin
YTA


Add "My Computer" to Your Windows 7 / Vista Taskbar

Posted on:
tags: , , ,

I like to have the quickest access possible to folders on my desktop, which usually means putting something onto the taskbar if possible. You can add the Computer menu as a folder on the taskbar for the easiest access to your drives. You could also use this tip for any folder you want.
To add a folder to the taskbar, just right-
click on the taskbar and choose the Toolbars menu, and then click on New Toolbar. 

Just find the folder that you want… in this instance we’ll select the Computer icon and then click on Select Folder. 

Now you can see the Computer folder right there on the taskbar. If you click the little arrows it will pop up and let you browse through all your drives. 


I always add the Desktop to the toolbar as well.


This works on both windows 7 and vista


Simple Windows Hacking ...its cool !

Posted on:
tags: , , , ,
Hacking Windows User Account password


 Passwords are Stored and Transmitted in an encrypted form called a Hash. When a User logs on to a system and enters a password, a hash is generated and compared to a stored hash. If the entered and the stored hashes match, the user is authenticated (This is called the Challenge/Response).

 Passwords may be cracked manually or with automated tools such as a Brute-force method or the Rainbow Table attack.


In this if we put the password and windows vey the password we entered on teen with the file in which the password is stored of ours.

 This is stored in a file named SAM.


It is shown in the picture above.

Now we need to attack this file.

For this we need to open this file but it is not possible as it is in process by the computer from its start up.

And we suppose that the file opens then also we cannot see the passwords stored in it because they are encrypted in the form of HASHES.

And they and not be decrypted. Ad it is the hardest encryption done and decryption is not easy.

But it is not impossible.

We Need a Bootable CD named Hiren boot and Can Crack the Password.

But Another Attack –

Go to C:\Windows\System32\

Copy the File cmd.exe to desktop and rename it to sethc.exe.

Now copy the file sethc.exe to C:\Windows\System32\ and will give an error, give that error YES. And replace it.

 Now You Are Done.

 Now At the Login Screen Press SHIFT Key 5 times and a beep Sound will come and Command prompt will open.

In the command prompt type “explorer.exe” and Hit Enter a desktop will open in the tab mode.Use The Computer Unlimited….


>